Skyboxes
For a world to feel immersive, it needs a sky. It also needs a horizon—with mountains or a cityscape in the distance. A solid background color isn't enough. However, we don't want to waste resources on objects that the viewer will never see up close. Those stars in the sky and that volcano are always going to be far away. Instead of rendering them as 3D models, we present the horizon and sky content in flat textures. Just as flat backdrops situate a theatrical production, these textures situate our rendered scene.
There's a one big difference between 3D graphics and theater. In a renderer, the viewer can move and turn. A single flat texture at the back of the negative z-axis is not enough. We need to surround the viewer with background imagery on all sides. One option is to render a sphere around the viewer and texture it with a panoramic image. This option is not ideal because wrapping a sphere with a flat texture is awkward.
A simpler option is to render a textured cube around the viewer. We need six textures that seamlessly piece together to form what is called a skybox. Like this one, which is shown flattened:
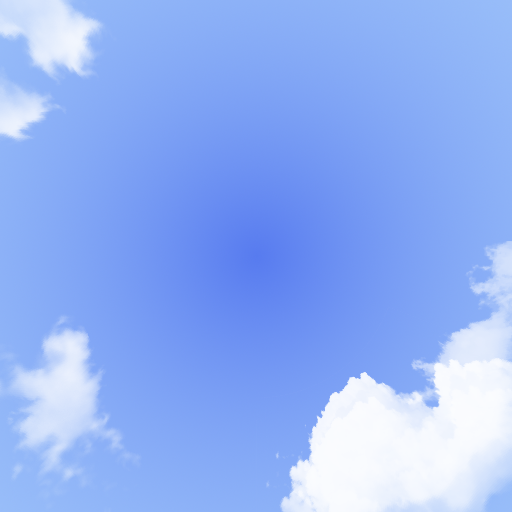

The texture in the top row is the top face of the skybox. The texture in the bottom row is the bottom face. The textures in the middle are the left, back, right, and front faces, respectively.
Cubemap
WebGL has builtin support for managing skybox textures. We have used gl.TEXTURE_2D as the target for single textures. The target for a six-image skybox texture is gl.TEXTURE_CUBEMAP. We create a single cubemap texture and then upload each face's 2D texture separately. This utility method reads in the six images from a directory, creates the cubemap texture, and then uploads the images:
async function loadCubemap(directoryUrl: string, extension: string, textureUnit: GLenum = gl.TEXTURE0) {
  const faces = ['posx', 'negx', 'posy', 'negy', 'posz', 'negz'];

  const images = await Promise.all(faces.map(face => {
    const url = `${directoryUrl}/${face}.${extension}`;
    return fetchImage(url);
  }));

  gl.activeTexture(textureUnit);
  const texture = gl.createTexture();
  gl.bindTexture(gl.TEXTURE_CUBE_MAP, texture);

  gl.texImage2D(gl.TEXTURE_CUBE_MAP_POSITIVE_X, 0, gl.RGBA, gl.RGBA, gl.UNSIGNED_BYTE, images[0]);
  gl.texImage2D(gl.TEXTURE_CUBE_MAP_NEGATIVE_X, 0, gl.RGBA, gl.RGBA, gl.UNSIGNED_BYTE, images[1]);
  gl.texImage2D(gl.TEXTURE_CUBE_MAP_POSITIVE_Y, 0, gl.RGBA, gl.RGBA, gl.UNSIGNED_BYTE, images[2]);
  gl.texImage2D(gl.TEXTURE_CUBE_MAP_NEGATIVE_Y, 0, gl.RGBA, gl.RGBA, gl.UNSIGNED_BYTE, images[3]);
  gl.texImage2D(gl.TEXTURE_CUBE_MAP_POSITIVE_Z, 0, gl.RGBA, gl.RGBA, gl.UNSIGNED_BYTE, images[4]);
  gl.texImage2D(gl.TEXTURE_CUBE_MAP_NEGATIVE_Z, 0, gl.RGBA, gl.RGBA, gl.UNSIGNED_BYTE, images[5]);

  gl.generateMipmap(gl.TEXTURE_CUBE_MAP);

  return texture;
}
async function loadCubemap(directoryUrl: string, extension: string, textureUnit: GLenum = gl.TEXTURE0) {
const faces = ['posx', 'negx', 'posy', 'negy', 'posz', 'negz'];
const images = await Promise.all(faces.map(face => {
const url = `${directoryUrl}/${face}.${extension}`;
return fetchImage(url);
}));
gl.activeTexture(textureUnit);
const texture = gl.createTexture();
gl.bindTexture(gl.TEXTURE_CUBE_MAP, texture);
gl.texImage2D(gl.TEXTURE_CUBE_MAP_POSITIVE_X, 0, gl.RGBA, gl.RGBA, gl.UNSIGNED_BYTE, images[0]);
gl.texImage2D(gl.TEXTURE_CUBE_MAP_NEGATIVE_X, 0, gl.RGBA, gl.RGBA, gl.UNSIGNED_BYTE, images[1]);
gl.texImage2D(gl.TEXTURE_CUBE_MAP_POSITIVE_Y, 0, gl.RGBA, gl.RGBA, gl.UNSIGNED_BYTE, images[2]);
gl.texImage2D(gl.TEXTURE_CUBE_MAP_NEGATIVE_Y, 0, gl.RGBA, gl.RGBA, gl.UNSIGNED_BYTE, images[3]);
gl.texImage2D(gl.TEXTURE_CUBE_MAP_POSITIVE_Z, 0, gl.RGBA, gl.RGBA, gl.UNSIGNED_BYTE, images[4]);
gl.texImage2D(gl.TEXTURE_CUBE_MAP_NEGATIVE_Z, 0, gl.RGBA, gl.RGBA, gl.UNSIGNED_BYTE, images[5]);
gl.generateMipmap(gl.TEXTURE_CUBE_MAP);
return texture;
}The six images are assumed to be named after the side of the cube on which they appear. For example, if our images are PNGs, the right face will be named posx.png.
Skybox
The cubemap texture needs to be attached to a cube in order to be seen. The cube should be a unit cube, spanning from [-1, 1]. It's a little different than the other 3D models that we've rendered in that the viewer is going to be inside of it—always. Its front faces will therefore be wound opposite the usual order. Also, we aren't going to shade it. We don't need three different vertices at each corner in order to get three separate normals. The faces can share vertices, which means we can use a cube model with just 8 vertices.
This utility method creates an 8-vertex unit cube with the faces pointing inward:
export class Prefab {
  // ...

  static skybox() {
    const positions = [
      new Vector3(-1, -1,  1),
      new Vector3( 1, -1,  1),
      new Vector3(-1,  1,  1),
      new Vector3( 1,  1,  1),
      new Vector3(-1, -1, -1),
      new Vector3( 1, -1, -1),
      new Vector3(-1,  1, -1),
      new Vector3( 1,  1, -1),
    ];

    const faces = [
      [1, 0, 2],
      [1, 2, 3],
      [4, 5, 7],
      [4, 7, 6],
      [5, 1, 3],
      [5, 3, 7],
      [0, 4, 6],
      [0, 6, 2],
      [6, 7, 3],
      [6, 3, 2],
      [0, 1, 5],
      [0, 5, 4],
    ];

    return new Trimesh(positions, faces);
  }
}
export class Prefab {
// ...
static skybox() {
const positions = [
new Vector3(-1, -1, 1),
new Vector3( 1, -1, 1),
new Vector3(-1, 1, 1),
new Vector3( 1, 1, 1),
new Vector3(-1, -1, -1),
new Vector3( 1, -1, -1),
new Vector3(-1, 1, -1),
new Vector3( 1, 1, -1),
];
const faces = [
[1, 0, 2],
[1, 2, 3],
[4, 5, 7],
[4, 7, 6],
[5, 1, 3],
[5, 3, 7],
[0, 4, 6],
[0, 6, 2],
[6, 7, 3],
[6, 3, 2],
[0, 1, 5],
[0, 5, 4],
];
return new Trimesh(positions, faces);
}
}The cube is positioned around the origin in model space, but it must be situated around the viewer in world space. If the viewer is a movable camera, then the cube needs to move with it. This is a job for a translation matrix. The worldFromModel matrix tacks on the camera's location to the skybox's model space coordinates, while the other two matrices perform their usual operations:
const worldFromModel = Matrix4.translate(camera.from.x, camera.from.y, camera.from.z);
skyboxProgram.setUniformMatrix4fv('worldFromModel', worldFromModel.buffer());
skyboxProgram.setUniformMatrix4fv('clipFromEye', clipFromEye.buffer());
skyboxProgram.setUniformMatrix4fv('eyeFromWorld', camera.matrix.buffer());
const worldFromModel = Matrix4.translate(camera.from.x, camera.from.y, camera.from.z);
skyboxProgram.setUniformMatrix4fv('worldFromModel', worldFromModel.buffer());
skyboxProgram.setUniformMatrix4fv('clipFromEye', clipFromEye.buffer());
skyboxProgram.setUniformMatrix4fv('eyeFromWorld', camera.matrix.buffer());Texturing a skybox is a little different than texturing a regular 3D mesh. For one, the cube doesn't have any texture coordinates in its vertex attributes. That's because the 3D vertex position itself is used to look up a color in the cubemap. This vertex shader runs the position through the matrix gauntlet and then sends along the texture coordinates to the fragment shader:
uniform mat4 clipFromEye;
uniform mat4 eyeFromWorld;
uniform mat4 worldFromModel;
in vec3 position;
out vec3 mixTexPosition;

void main() {
  gl_Position = clipFromEye * eyeFromWorld * worldFromModel * vec4(position, 1.0);
  mixTexPosition = position;
}
uniform mat4 clipFromEye;
uniform mat4 eyeFromWorld;
uniform mat4 worldFromModel;
in vec3 position;
out vec3 mixTexPosition;
void main() {
gl_Position = clipFromEye * eyeFromWorld * worldFromModel * vec4(position, 1.0);
mixTexPosition = position;
}The fragment shader looks up the color from the texture in the same way as a conventional 2D texture. The only differences are that the texture is a samplerCube and the coordinates are a vec3:
uniform samplerCube skybox;
in vec3 mixTexPosition;
out vec4 fragmentColor;

void main() {
  fragmentColor = texture(skybox, mixTexPosition);
}
uniform samplerCube skybox;
in vec3 mixTexPosition;
out vec4 fragmentColor;
void main() {
fragmentColor = texture(skybox, mixTexPosition);
}WebGL hides the details of texture lookup from us. In case you ever want to perform the same task yourself, consider the 3D texture coordinates as a vector reaching out from the center of the box to one of the faces. The strongest component identifies which of the six faces is being pointed at. We want to draw the color from that face's texture. The two weaker components act as the s- and t-coordinates.
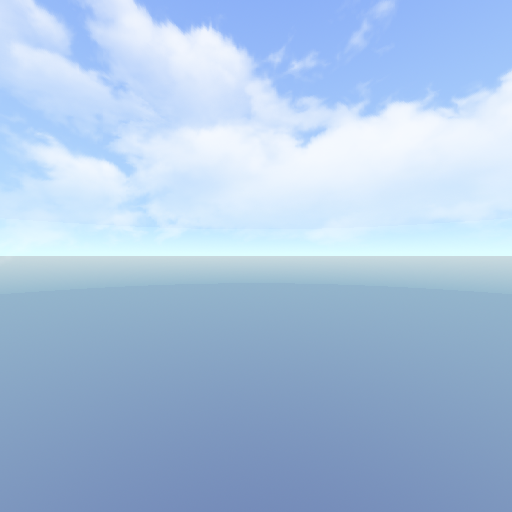
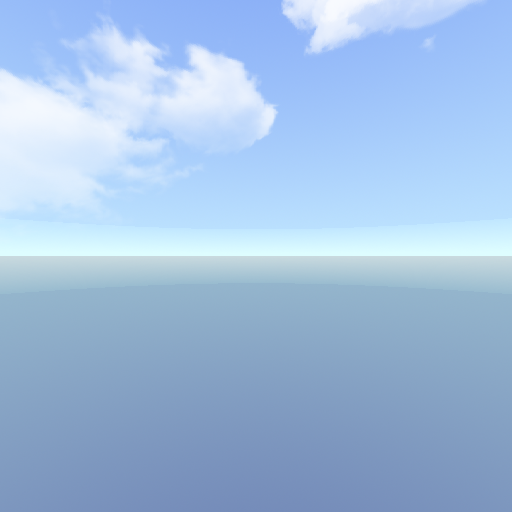
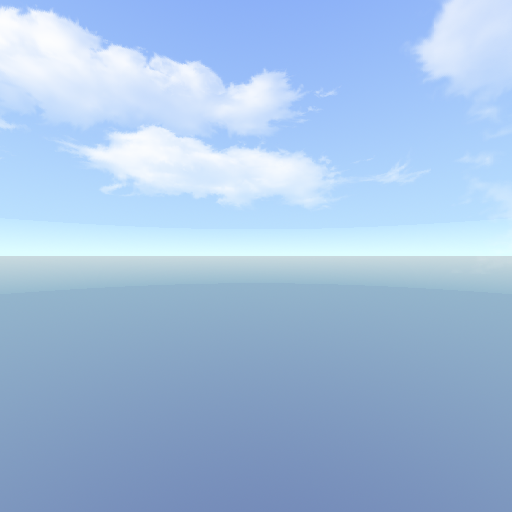
The renderer below loads in a heightmap and a cubemap texture, drops a first-person camera onto the middle of the terrain, and renders the skybox around the camera:
The preview on the bottom-left shows an overhead view. We can see in the overhead view how the skybox is really just a trick. The clouds aren't really in the sky; they're just above the viewer's head. But something's wrong. The terrain is not visible. Well, not exactly. If you look down at your feet, you'll see the vertices of the terrain that are inside the skybox. All of the vertices outside the skybox are thrown out because they do not pass the depth test. The skybox is closer to the viewer.
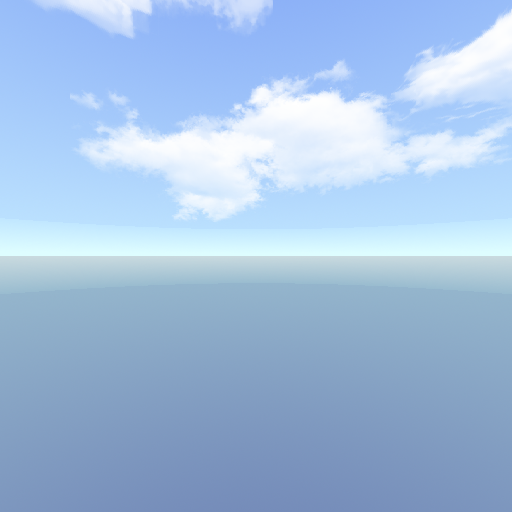
There are several ways to fix this. The simplest is to stop the skybox from writing its depths to the depth buffer, which we can do with code like this:
gl.depthMask(false);
// draw skybox

gl.depthMask(true);
// draw rest of scene
gl.depthMask(false); // draw skybox gl.depthMask(true); // draw rest of scene
The order matters. The skybox is drawn first so that its colors land in the framebuffer. Then the rest of the scene is drawn. Since no depths have been written, any object will pass the depth test, overwriting the background colors.
Uncheck the checkbox in the controls above to see how disabling writes to the depth buffer makes the terrain visible.